Posted on 5 Comments

The Solfège History

A brief word on the history of sight-singing

When I was a teenager, I noticed that there were people who were able to sing a melody that they had never heard before simply by reading from a page of sheet music. This made a deep impression on me. I was convinced that such people were born with some sort of supernatural ability and that mere mortals like myself might as well give up the notion of ever being able to do such a thing. When my mother told me that she had heard of a system whereby people could learn to sing from notes, I became very curious. But where could one find such a system?

I finally saw the light, when at the age of twenty, I began to study at the Berklee College of Music, in Boston, Massachusetts, USA. Later, I found out that I need not have traveled so far. This system is very old and universally known. It is called solfège.

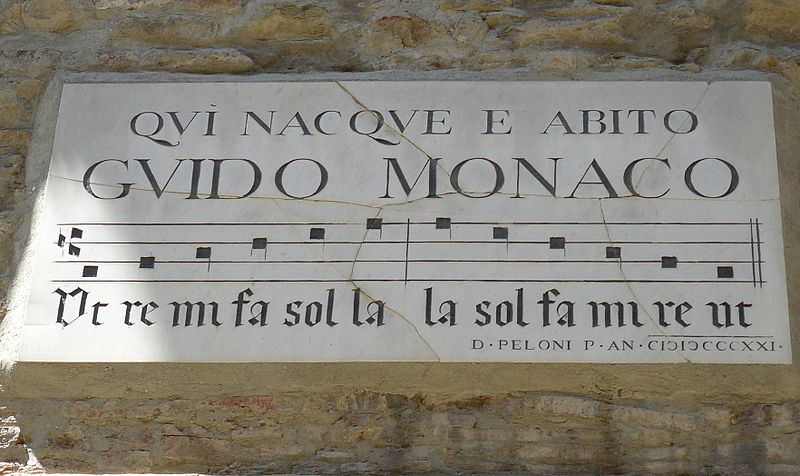
The system of solfège was invented nearly a thousand years ago by the same man who invented our note system. He was the Italian, Guido di Arezzo (ca. 995-1050).

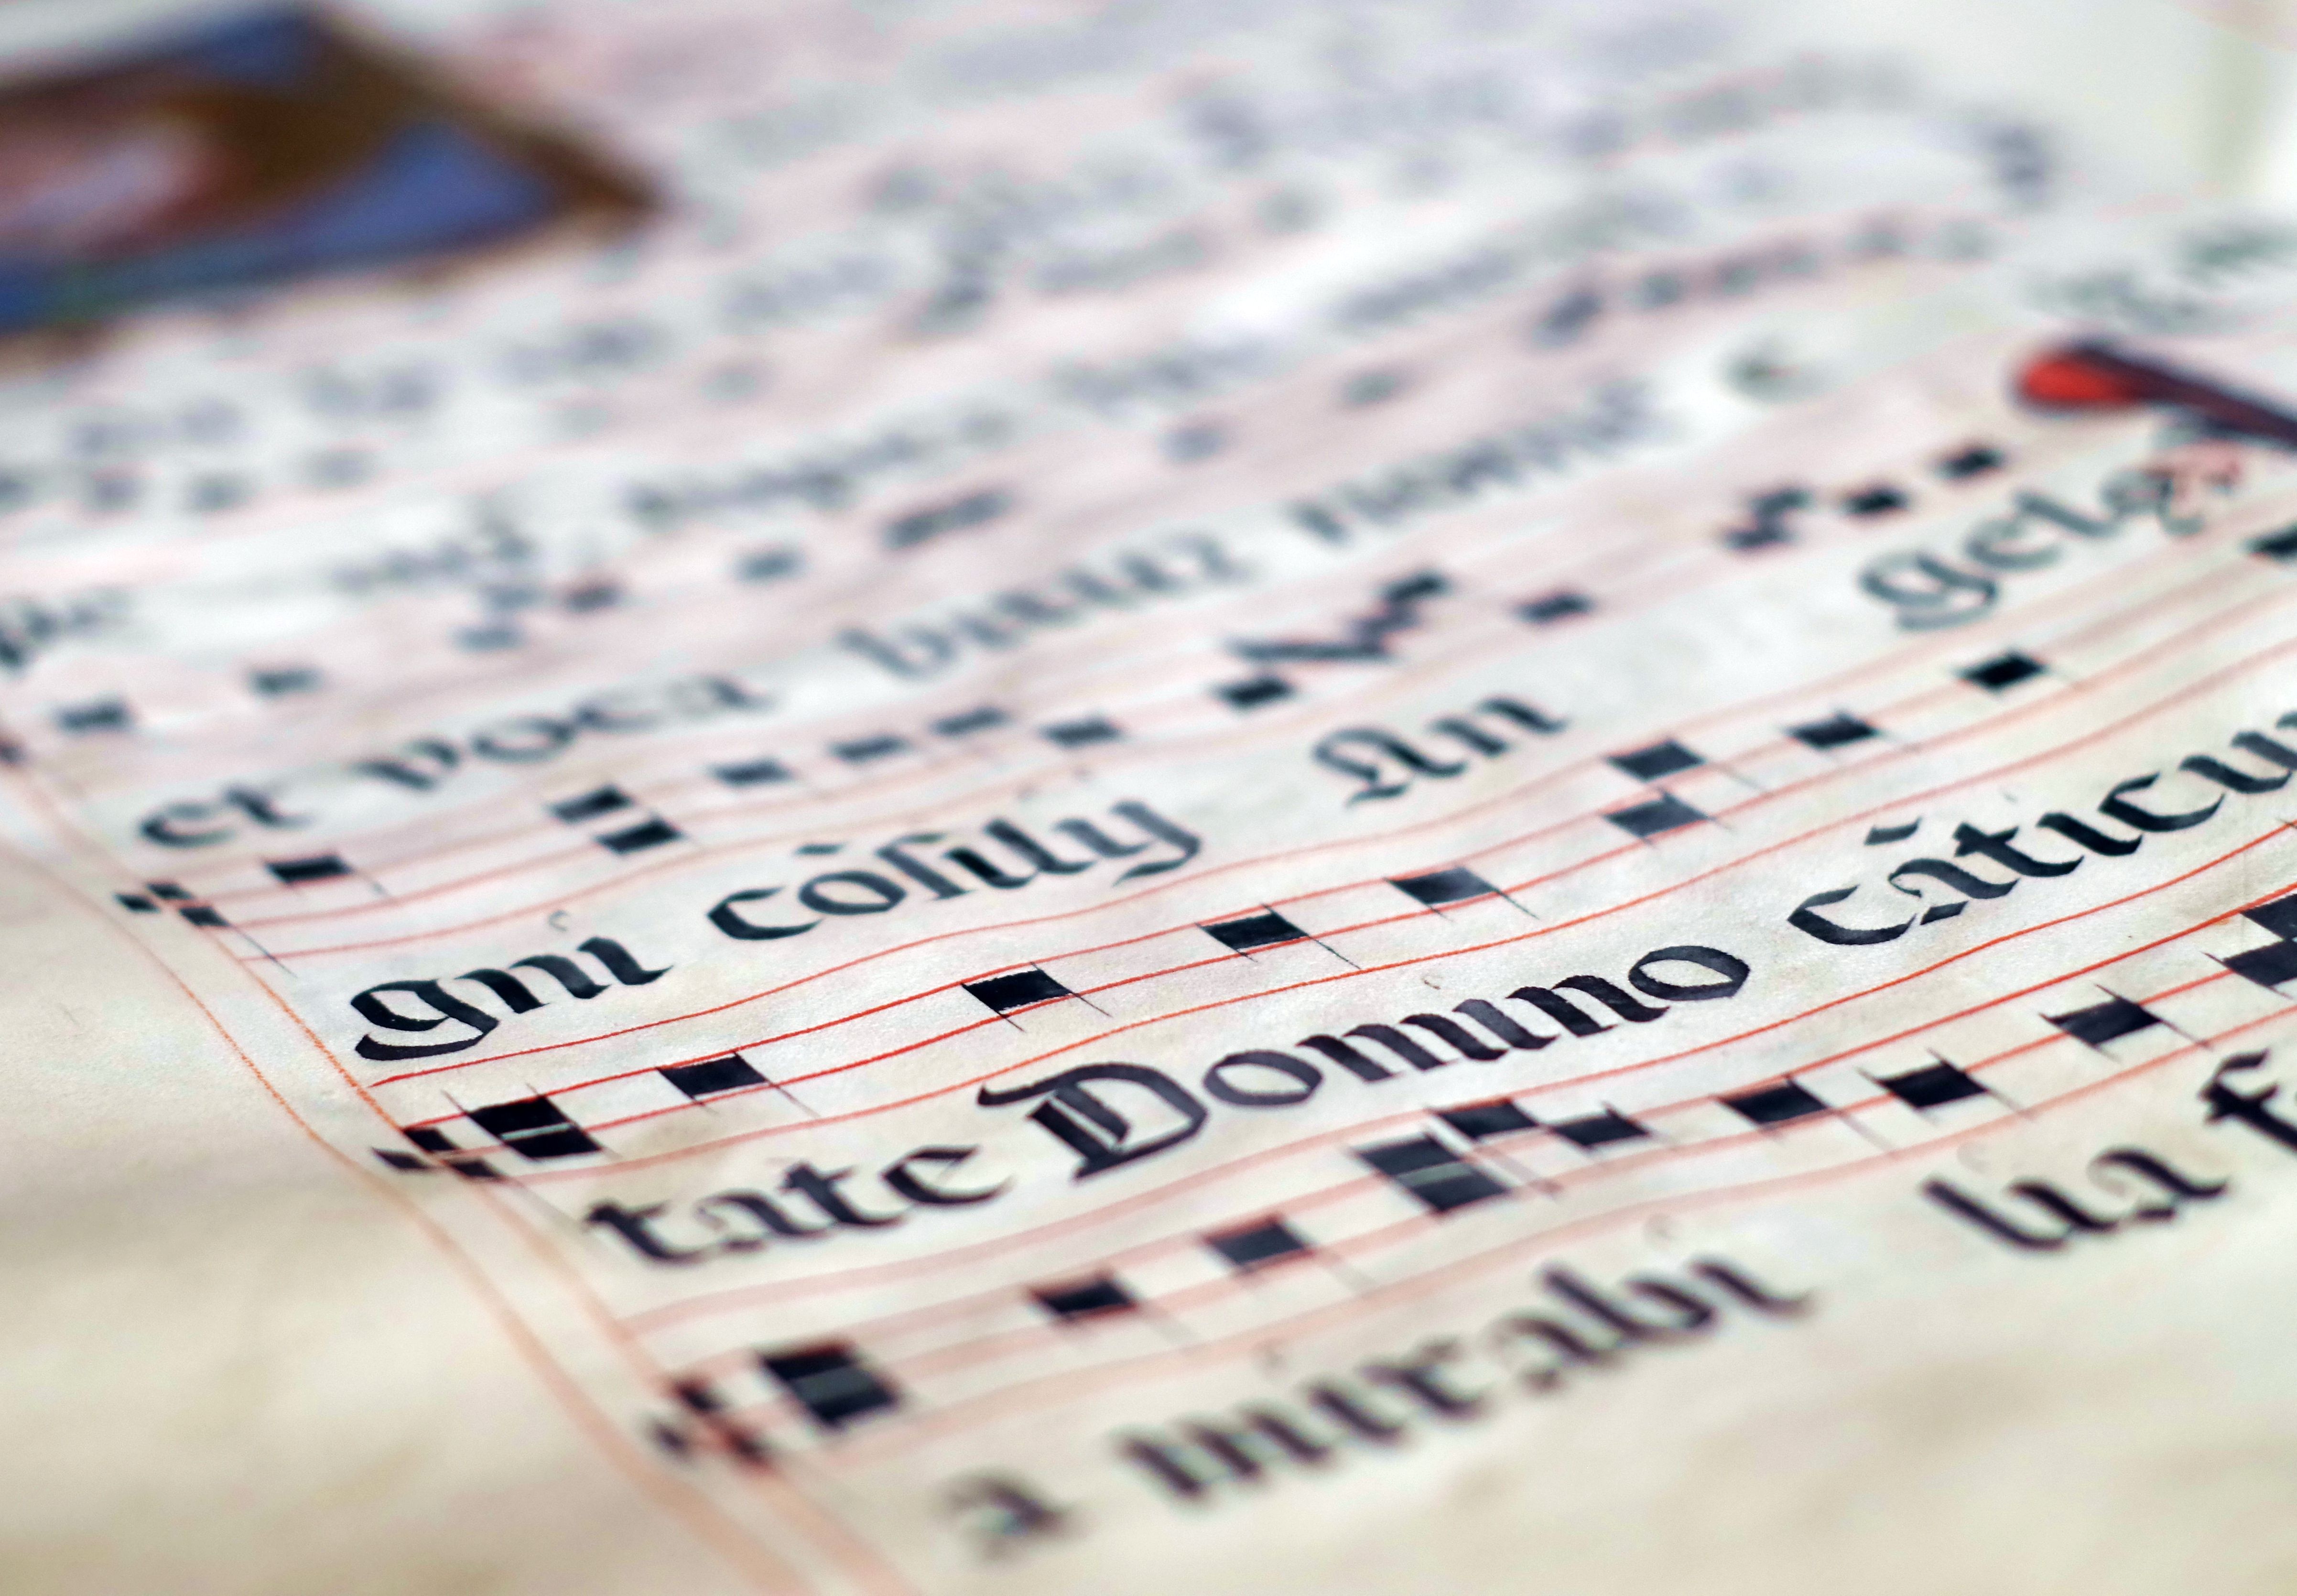
We don’t really know much about this remarkable man other than that he was a monk from a monastery in Arezzo, Toscana, and that he was known to be a wonderful teacher. The first that we hear of Guido is in 1029, when he is invited by Pope John the 21st. to demonstrate his by now famous teaching methods. Guido had two very interesting systems up his sleeve. One of them consisted of four horizontal lines on which could be placed some small squares, either on the lines or in the spaces between them. With the help of this system he could notate all of the churches melodies. The other system consisted of an old hymn from the 8th century that Guido had written a melody to. The text was as follows:

Ut queant laxis
Resonare fibris
Mira gestorum
Famulituorum
Solve pulluti
Labii reatum
Sancte Johannes

Guido had composed the melody in a major scale beginning the first tone of each line one step above the first tone in the preceding line. From this was derived the scale ut-re-mi-fa-sol-la. Now, having learned Guido’s melody by heart, the student could always find the tone mi or fa in relation to the tonic (the first tone of the scale). But that wasn’t all. Guido claimed that with the help of these two systems he could teach a person to sing from notes in one month. A new era had begun. The pope was impressed. He knew that for hundreds of years the church had tried hard to get the melodies on paper. Now, this man stood in front of him with a system in hand whereby not only all the melodies could be written down, but people could learn to read them fairly easily. “I propose that you assume the position of Bishop”, said the Pope. But Guido was deep into the world of music and did not want the many obligations that would weigh heavy on the shoulders of a bishop. Instead he chose to continue teaching and doing research, which we should probably be very grateful for to this day.

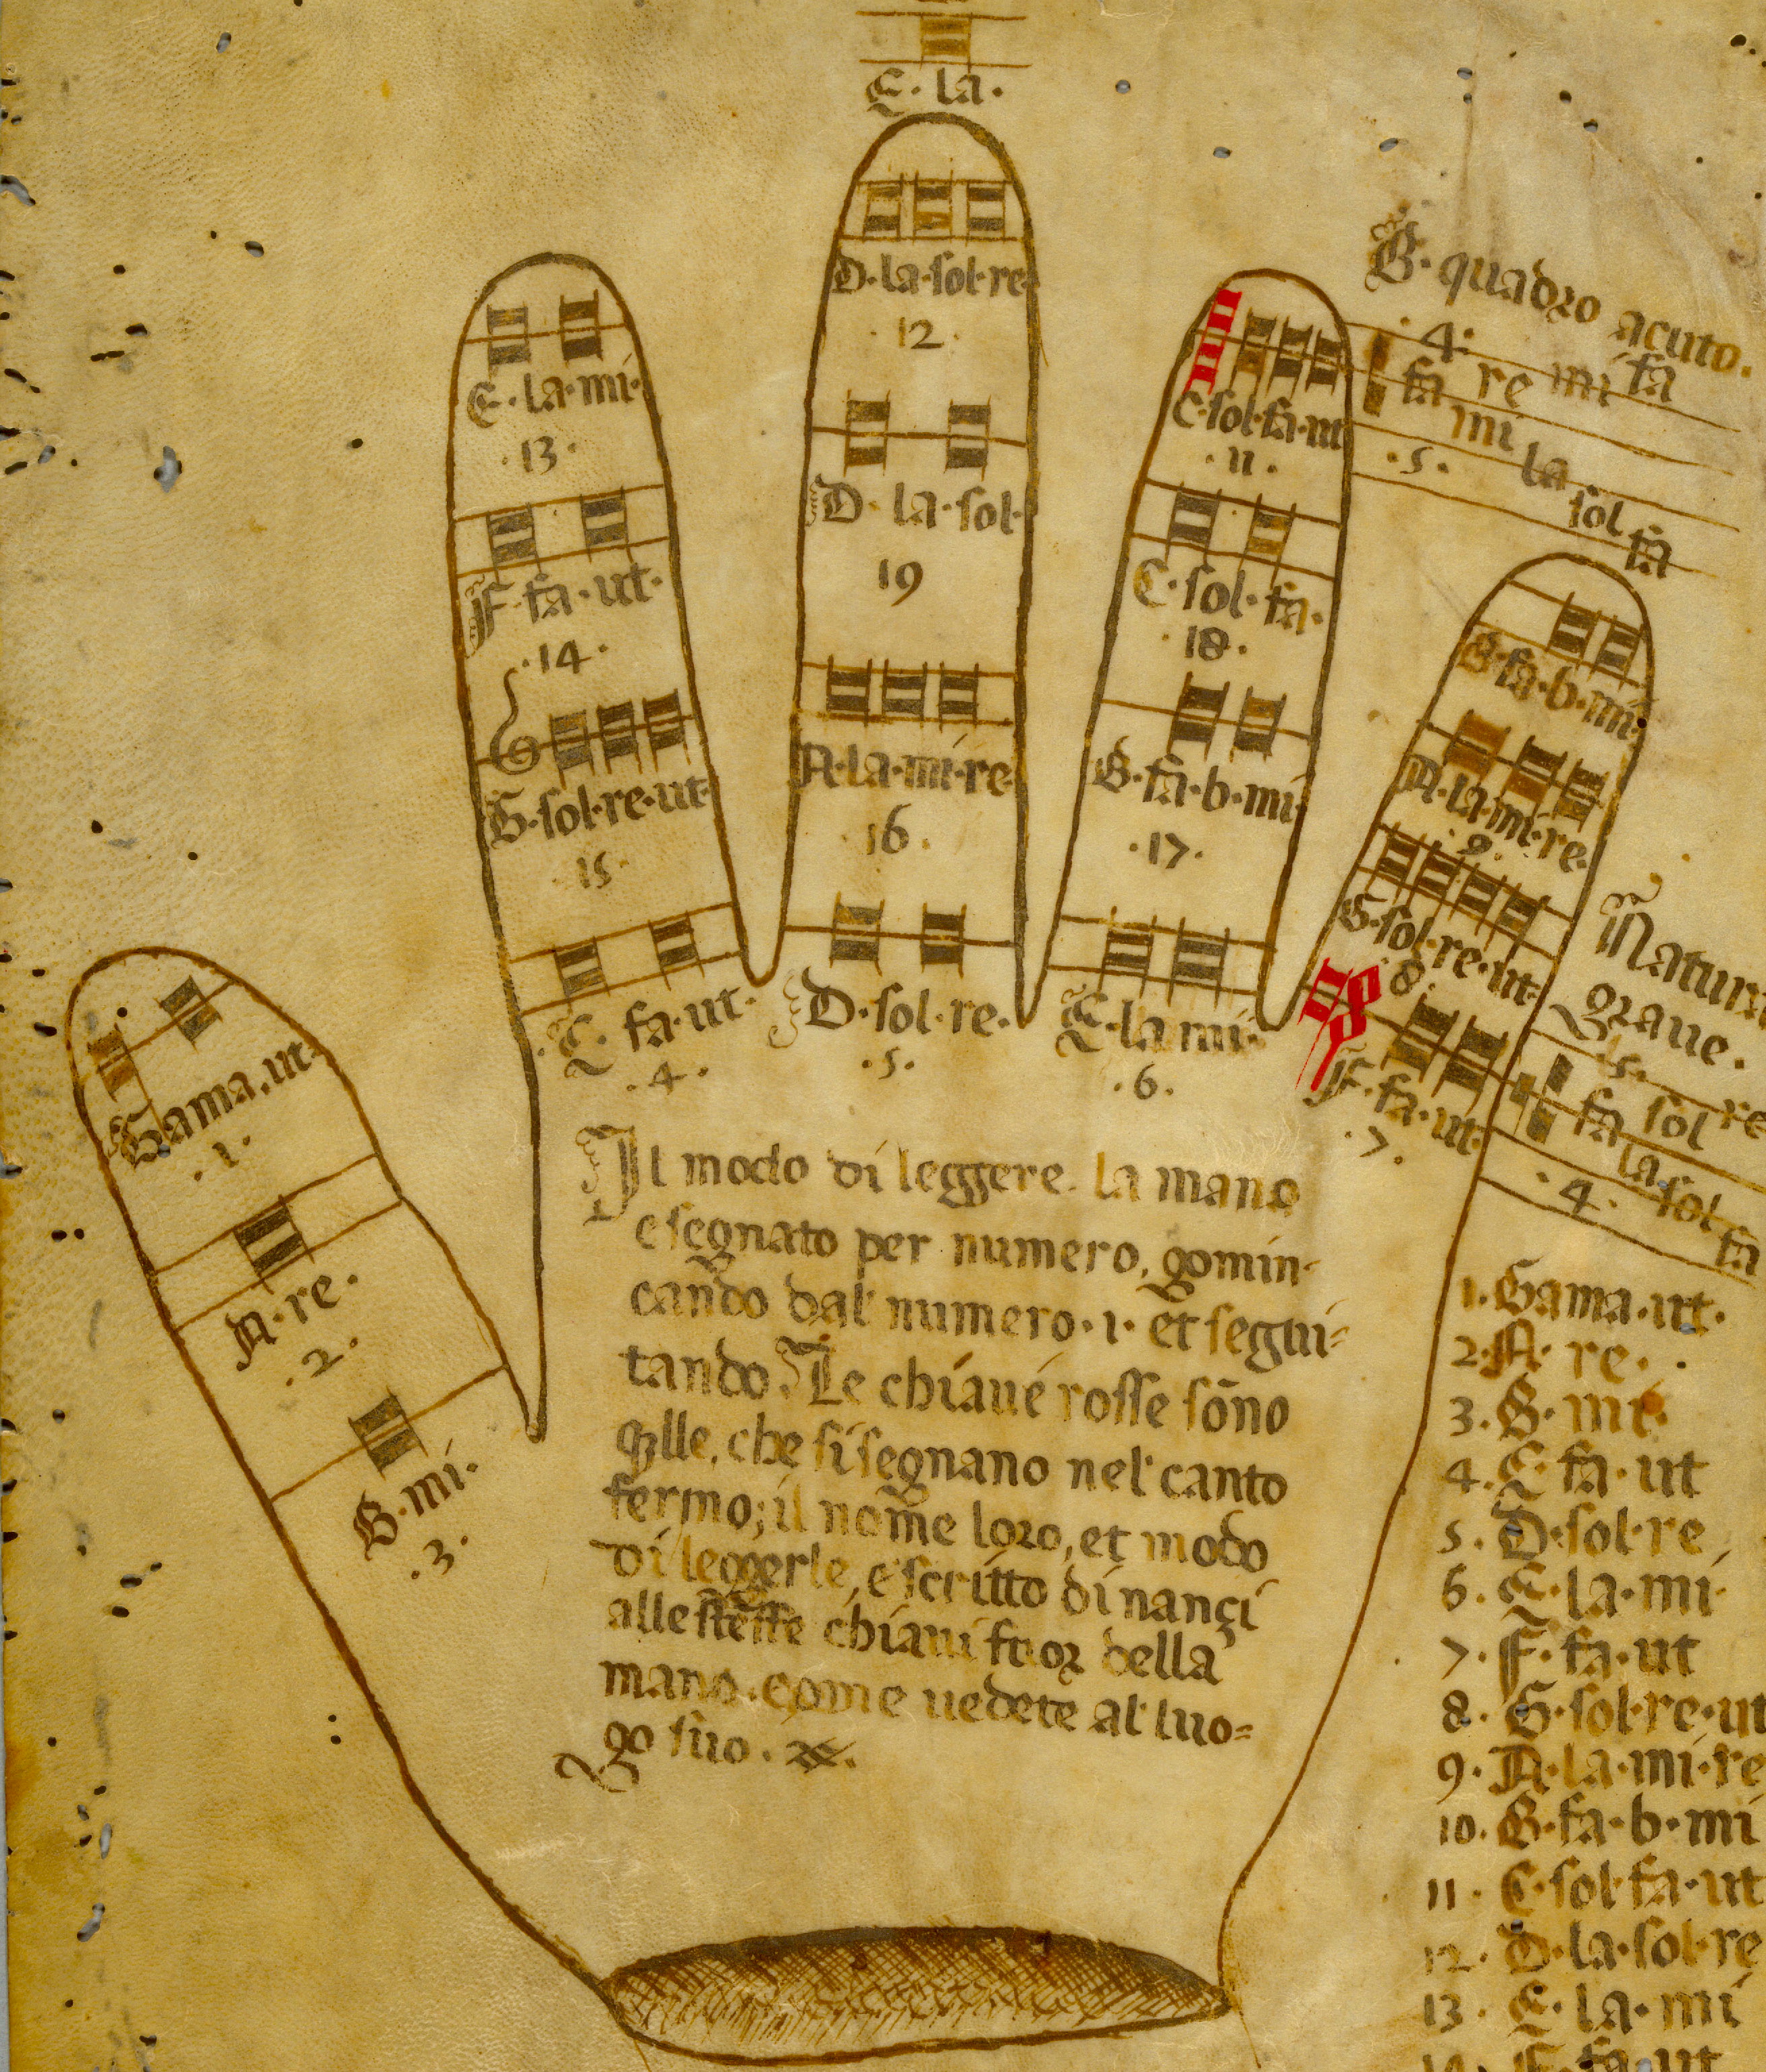
Guido had many other inventions. One of them was “the Guidonian Hand”, a system in which various places on the palm of the hand and on the fingers represented different syllables in the solfège exercise. The teacher could now, by pointing to his left hand, train the choir and the students in little melodies or difficult “jumps”.

After the death of Guido in 1050 there was no one who was able to – or who dared – make improvements to the system. For centuries the ut-re-mi-fa-sol-la scale was used for singing, until in the 16th century it became the ”do-re-mi-fa-so-la-ti-do” – the major scale that we know today. The pure minor scale was always sung from the “la”: “la-ti-do-re-mi-fa-so-la” – the pure minor scale.

This is a sort of switching around of the major scale. In our day and age, where there is a lot of consciousness as to the use of scales, there is a tendency to let the “do” be the tonic (the first tone of the scale), giving the following appearance to the minor scale: do-re-me-fa-so-le-te-do. It is still a pure minor scale, but now it has the same order and nearly the same names as in the major scale, just with a lowered 3rd, 6th and 7th step.

In theory it is all very simple. Now let’s get to practicing!

Posted on 1 Comment

A manual for the independent student

Hi, and welcome to SIGHT-SINGING’s guide for the lonely student. In this section, I will do my best, that you, on your own, can steer clear of the major pitfalls out there in the big bad jungle of sight-singing.

The materials that you will need to get started are:

[list type=”check”]

  • A tonal instrument – a piano/keyboard. However, other chromatic instruments such as guitar, accordion, harp, smartphone with a piano app installed etc. will also do the job.
  • A copy of a SIGHT-SINGING book. (Start with Volume 1, The Pentatonic Scale)
  • A music stand might be helpful
  • A peaceful place to practice. Don’t underestimate the physical conditions under which you practice. If you are in the middle of a demanding exercise, it won’t exactly increase your concentration if your upstairs neighbor comes home and decides to test drive “Rage Against the Machine” on his brand new iPad based stereo system, successfully equipped with amazing satellite speakers and earthquake sub-woofers. Get yourself some peace and quiet during your practice time. [/list]


You also need some, though very basic, prior knowledge of musical theory. You might still feel unsure of certain terms. If you do not yet know the names of the notes and where to find them on your chosen instrument, you will need to learn this before getting started on SIGHT-SINGING. If a Google search can’t do the job, then perhaps the saxophone player next door, or your grandma’ – didn’t she use to sing Schubert? – can quickly show you.
Now you should be ready for SIGHT-SINGING.

Enough of that. Let’s get started!

All the musical examples (charts) in this book are divided into one of the following categories: Melodies, Rhythms, Exercises, and Chords. You will find that the majority of the examples are Melodies, followed by Rhythms and Exercises. There are only a few pages of Chords, but they are tough, offering you lots of challenge. In the headings on each page, you will find the category that is being dealt with in the exercises on that particular page. Example: “Melodies: so-la-do”, meaning that the following melodies will consist of the notes “so”, “la” and “do”.

[space height=”20″]
[divider scroll_text=””]
[space height=”40″]

The method of practice will vary with the type of musical example.
Let’s take them one by one:

Melodies

  1. Start by playing and singing “do”. If the chart is in the key of F major (you will find an arrow to the left of every musical example, pointing out “do”), play an F on your instrument and at the same time sing “doooooeh” on the F.
  2. Silence your instrument and stop singing, but remember the note in your head.
  3. Sing the melody using the solfège syllables.
  4. Sing the exercise twice without making any mistakes before moving on.


Rhythms

  1. Sing the rhythms on a syllable that you like – for example “da” or “la”.
  2. Sing the rhythms through twice without any mistakes before moving on.


Exercises

  1. Play and sing “do”.
  2. Sing the solfège exercise from beginning to end.
  3. Learn it by heart.
  4. Close your eyes or cover the exercise with your hand.
  5. Sing the exercise again once through – without looking and without mistakes – before moving on.


Chords

  1. Play and sing “do”.
  2. Sing the solfège part through.
  3. Play through the tonics of the chords on your instrument. If “do” of the chords is F, then “III” is an “A”, and “bVI” a “Db”.
  4. Sing through the exercise again, whilst playing the chords (or at least the tonic of the chords) on your instrument. Another option is getting a friend to sing the tonics.
  5. Sing the exercise through once without mistakes before moving on.


A common objective for all the exercises is that you must NEVER PLAY THE MELODY FIRST and then sing it afterwards. THAT WON’T TEACH YOU ANYTHING! You may occasionally check one note, if you are in doubt as to whether your pitch is right, but don’t play the exercise. Not even parts of it.
[space height=”40″]
[divider scroll_text=””]

A word on practicing technique.

Let me tell you right away, that you won’t master sight-singing in a week or even two. If you are a beginner and your goal is to be able to sing all the melodies in all 3 books, then it is probably more realistic to figure on 1-2 years. Naturally, this depends on HOW MUCH YOU PRACTICE, and HOW YOU PRACTICE.

Let’s say that your plan was to practice sight-singing 7 hours a week. Monday, Tuesday, Wednesday, Thursday, and Friday you didn’t get around to it. Things kept getting in the way of practicing. Now Saturday is here and you have decided to spend all day in order to catch up. According to plan, you start at 10 a.m. and the first half hour is great. At 10:50 you start feeling a bit hungry and dehydrated (maybe it got a bit late last night). At 11:15 you are heading for the kitchen. The newspaper is on the counter. It looks much more tempting to you than it did 2 hours ago. 12:05, you continue where you left off. 12:20, you catch yourself drifting, you start telling yourself that these new melodies are too hard. Instead, you go back to singing some of the old exercises again. 12:27, you are yawning and stretching. 12:38, drifting again. It doesn’t seem to work for you today. You decide to postpone until tomorrow, when you can really get down…

The person, in this little scenario above, is really just making one mistake. That is in thinking that it is possible to practice sight-singing for 5-6 hours straight. There might be some people who are able to. I just don’t know of any. If you are practicing piano or guitar, you can do finger exercises for hours on end while watching TV or reading a comic book. Sight-singing does not work that way. It requires a lot more concentration. Therefore, 6 hours a week – great! But distribute them over some days. My personal recommendation is 1 hour of practice a day. But try different ways and keep a keen eye on your concentration level.

One more piece of advice. Do the exercises in the right order. The reasons for that are many. You will feel yourself improving. It strengthens your willpower and selfconfidence. Last but not least, the musical parts are composed as a complete and extensive course, with a very gradual increase in difficulty. Remember, you must crawl before you can fly!

ENJOY!  🙂